Saturday 13 January 2024

Dissecting the Ghiara

I was asked in a photo discussion to describe how I put together a series of shots of the Ghiara in Reggio Emilia. I thought it might be interesting to make a short Blog post about how I went about getting the final images.

These shots were made in dim difficult lighting conditions with a huge dynamic light range. I made a series of horizontal and vertical shots with a Nikon Z7 + Laowa 15mm Zero D shift, on a monopod with feet.  My tripod with a geared head would have been a better support, but tripods are often not allowed in these venues in Italy. The monopod often gets around this problem. 
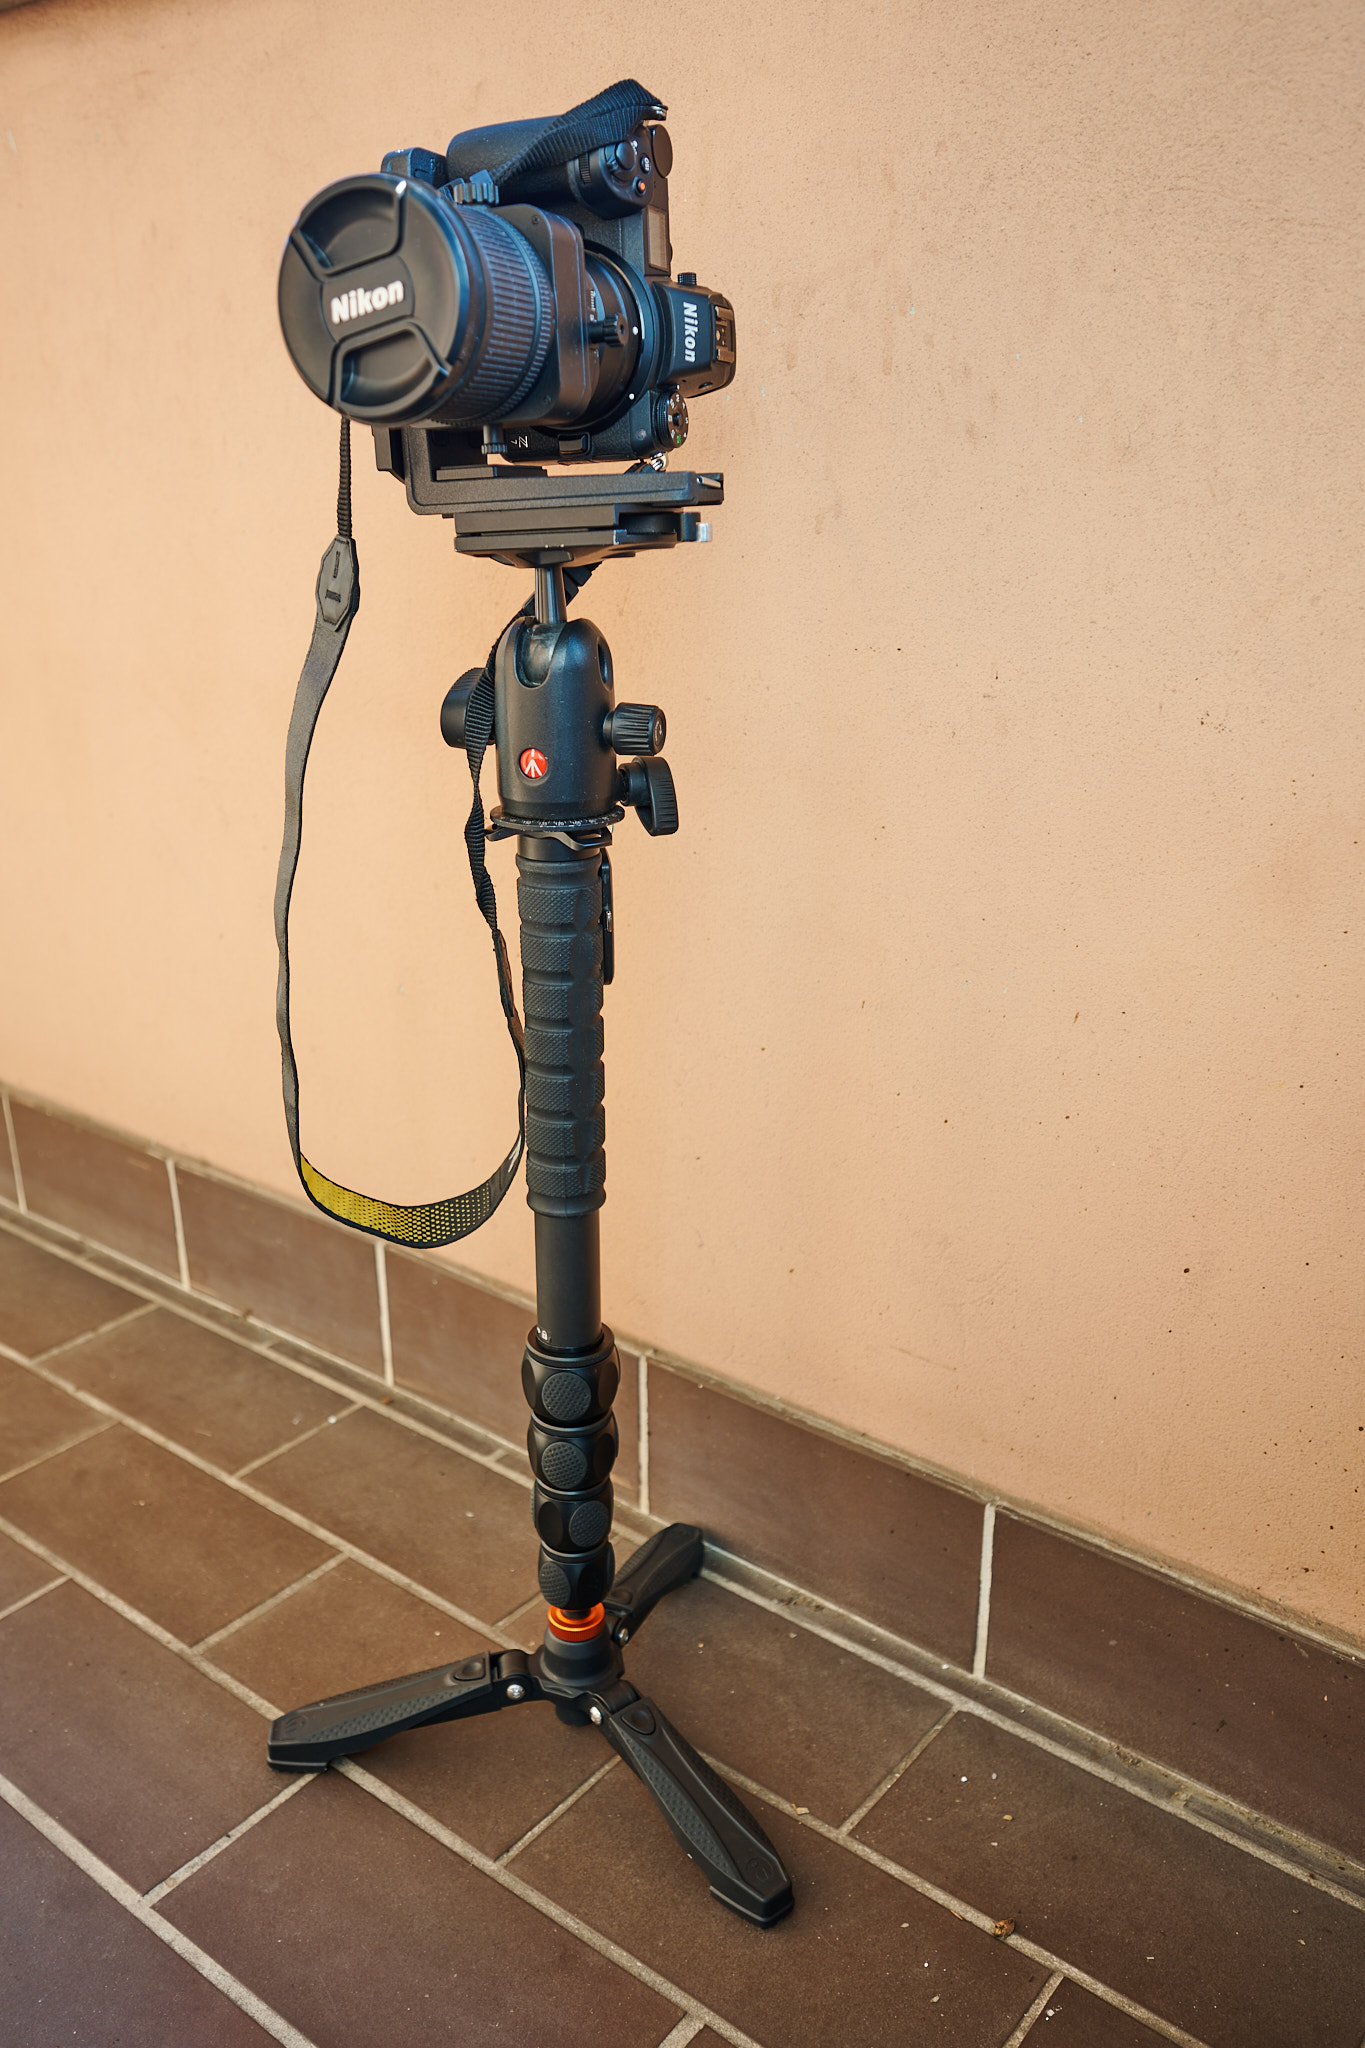
The shooting rig

First, let us look how the image was exposed. Thee shots were made in short succession with a metered midway exposure and one shot overexposed by two stops, and one underexposed by two stops.


The final shot

Metered exposure 

Metered exposure +2 stops

Metered exposure -2 stops

The + 2 stops exposure takes care of retaining detail in the shadow areas. The more important -2 stops shot takes care of brightly lit windows and the lighting. 

The shots were made at F8 with shots at approximately 2 seconds, 8seconds. and 30seconds.

The shots were combined in Capture one and the default image was obtained. Using the masking tools, certain areas were lightened or darkened and other parameters like colour balance, saturation contrast and such were tweaked.

Capture One default HDR output.

I had shot this place before with my Nikon 24mm PC lens, but I thought this venue deserved something more dramatic.  


A shot made with the 24mm PC

If we look at this hand held test shot made with the 24mm PC, the representation of the geometry looks quite credible, apart from the cupola base curves at the very top of the frame. The lens was at full shift vertically.

Shot made with the 15mm shift.

With the 15mm at full shift, we see that the expanded area with the whole base of the cupola is now visible. It is apparently distorted, stretched, to appear as being elliptical. (Note that the viewing distance of the image has an impact on the apparent distortion.)  

Incidentally, cropping the 15mm PC image down to the same image area of the 24mm PC shows that the perspective effects are now the same as the 24mm image above.


Vertical shots with shift lenses are more prone to giving results that look unnatural, with the stretching evident at the top (or bottom) of the frame with vertical shift. Horizontal shots, even with the 15mm at full vertical shift, still mostly look natural, unless some object is jutting out into the picture, I think, it is because we see the "stretching" on three sides. 


The horizonal version of the first picture. 

But the perspective becomes dramatic and theatrical, and unnatural, with the 15mm, when I shot across the nave at 45°. I explored the perspective effects of different wide angle lenses, in a previous post.

15mm lens


Thursday 13 April 2023

Shift Lens Notes


This is a collection of posts I made on the DPR Forum concerning shift lenses and Architecture. Just some slight editing to make them make sense out of context.

To do architectural photography at a certain lever, shift lenses are a must. They will allow you to compose precisely in camera without the hit and miss framing that you get when you do it in post. I only "do it in post " when I cannot use one of my shift lenses.

I quote from James Ewing from his textbook Follow the Sun. A book  aimed at professionals and students and considered a standard text.

"You might ask yourself "Do I really need an expensive tilt shift lens" Can't I just correct the perspective later in Photoshop?" The answer is yes you could correct it later, but the tilt shift lens allows you to see and feel the perspective of the images you are shooting. The final crop and ultimately the entire composition will be totally different in a shot that is corrected in post. If you cannot see the image while you are shooting you cannot control the composition and therefore you cannot effectively interpret the building. Correcting the perspective during post production causes a significant loss of sharpness and detail. The Tilt shift lens gives you accurate, sharp controlled images."

I think this says it all.

The old Nikon 28 mm and 35mm shift lenses are a cheap way to get started.  I picked up my Nikon 24 TS and 45mm TS for less than €1000


I find the angle I am shooting from, can give distorted results. I use diagonal shift a lot to sort these sorts of problems. Shots taken from the same position:


Vertical shift


Diagonal shift

My pictures below show what happens when you use a zoom with barrel distortion and correct in post. A wonky building looks more wonky. Don't ask me why!

Here is a church that is 800 years old. It has survived at least  a couple of strong earthquakes and the land in the mountains moves.  My TS lens shows the bell tower leaning.  But a test shot taken with a zoom shot and then corrected in post exaggerates the "Tower of Pisa" problems that this bell tower has. The wall on the left has problems too.


Shift with the camera level


Test shot corrected in post

Here I have overlaid the two images. The front is a almost perfect match with the hit and mis matching I did. The tower is very different. Both where shot with 24mm lenses


I think a whole lot of things added up. I have under corrected the front in this versione.

Closer this time but the tower seems wider and squatter, stretched in the correction.


I need to do this test in more controlled conditions, but this overlay raises some interesting questions.


Saturday 8 April 2023

When do I reach for M43 and when do I reach for something else?

This is a Thread I made on the DPR Forum in 2019. My opinions have changed as the Nikon Z system removed my need to run two systems, as the Z7 + 24-200 is a very powerful and lightweight travel solution, and I can also use it for my more static photogrphy with shift lenses, via the FTZ. But it was a nice thread, that unfortunately got a lot of hostile comments at the time. But M43 remains in my opinion, a really valid travel camera system.

When do I reach for M43 and of course when do I reach for something else?

Well the EM5 came along when I was doing a lot of hiking in the high Apennines. A nice three lens kit that covers 7mm-100mm is easy to carry on a long day hike. I sometimes throw the nice 60mm macro in the rucksack too.


Italy is very hot and often humid. For this trip to Bergamo in summer I was out and about all day and my three-lens set up gave me versatility and low weight and less sweat.

View: original size

Bologna, I had my compact kit in my briefcase and after a work appointment I had time to explore the city.

View: original size

It was easier persuading the custodian to let me take some pictures with my little “unprofessional” looking camera. Photography was not allowed here.

View: original size

A two hour walk to get to this place where I new I wanted the longest lens possible. The 100-300 is a sweet little lens that gets the job done without killing myself with a heavy lens.


The 100-300 on a tripod was transportable whilst taking a series of shots around this railway station by Calatrava. M43 is great with long lenses.


My EM5 fits in my briefcase. It was the obvious choice when I wanted to record a steel structure my studio designed for my web site.

View: original size

A crowded club where the notoriously grumpy Carl Palmer was playing. My EM5 with the little 35-100 was discrete, silent and face detect work a treat. Same for the other concert shot. The quality is more than fine.

View: original size

View: original size

Then there are occasions when I reach for something else.

I needed to pull a lot of detail out of the shadows on this shot taken on a medieval road in the Apennines. My D700/ 810 lets me work a lot on the files before unacceptable noise sets in.

View: original size

I am doing a lot more architectural photography. A Nikon PC lens, plus an old D700 cost me less than a good lens. The results are more natural and more controllable than key stoning in post.

View: original size

When I need subtle colour or tone transitions the D810 is my best choice.


Or when I do not have or want to carry a "proper camera" there is the iPhone.


Or my little LX100, my street camera.


I think my photographic interests are common to many here, travel, landscape, events and such. Nothing very specialist or extreme

I hope this thread usefully puts the eternal format diatribe into some little perspective.

Friday 7 April 2023

The Perils of Doing it in Post

 Just a little story from a photo shoot at a Romanesque building near Parma, in Italy.

You can see the whole story here .

The most interesting piece in this church is the twelfth century font. Its sides are very irregular and not always vertical. I used my Z7 to photograph it at first, but then I wondered how I would do the correction in post as I was shooting downwards even with my tripod at its lowest height.

With the 45 TS I was able to shoot with the camera level. and the lens dropped down.

When I got back home the 45TS shots just needed some basic adjustment, whilst the Z7 shots were almost impossible to correct to match the actual object.


To Close for Comfort

This might be of interest to those who photograph architecture and old monuments. It is a result of an experiment to rescue a shot i took at the Pieve of Gropina, in Tuscany.

The highlight of this church is the wonderful pulpit, but it is roped off like many such items in our monuments, to protect it from overenthusiastic visitors. So I had to shot with my wide zoom at 20mm, to avoid the ropes. The stretching in the resulting shot is quite strong.

As an experiment I ran it through DXO Viewpoint using the wide angle stretching tool. To me it looks much more natural. The perfect lens would have been the 45mm, but the ropes ruined the shot.

What do you think?

Original 20mm shot

Unstretched in Viewpoint.


Playing with Perspective Effects

I have been wanting to do this exercise for some time. I took my 4 shift lenses to the San Cataldo Cemetery in Modena to use the Ossario by Aldo Rossi as a test scene. I wanted to see the prospective effects as I switched lenses. Being a cube, it was almost perfect subject for my test. I stated with the 45mm TS and then attached the 35PC, 28PC and lastly the 24TS. I tried to fit the building equally into the pictures, but there is a certain approximation in my testing.

My first reaction is that the 45TS "flattens" to much at some angles. The 35PC seems the most natural, the 28PC neither here nor there and the 24mm the most dramatic. The 24mm is good for modern buildings but perhaps too much for older monuments.

The next test will be to find some old church with enough space to enable the use of the same four lenses for a similar test, but with the addition of diagonal shifts. Bell towers seem to be the critical part of the rendering of old churches, if you are not front on. But I want to codify this type of subject to make lens choice in the field easier.

I also met a charming American Architect who had travelled all the way up from Florence to Modena, just to see Aldo Rossi's creation here. She was pleased to find sombody to take a picture of her in front of the cube.

What do you think renders best?

PS this could be done in post too. So no polemic please

45mm


35mm


28mm


24mm

EDIT


Edited to Incluse a 15mm shift lens


45mm


35mm


28mm


24mm


Dissecting the Ghiara

I was asked in a photo discussion to describe how I put together a series of shots of the Ghiara in Reggio Emilia. I thought it might be int...